Any PC building hobbyist probably dreams of their perfect build. For some it's just whatever is the best bang for the buck, others go more extreme with water-cooling. Sometimes you see builders like Maki, Brodholm, or Laine (all whom got me going on this path) just push things to a different level, way beyond what I can accomplish.
I am just a designer that wishes he could work as an industrial designer. And as such decided to amateurishly design a computer case. Twice now actually. So if you are the same as me, dreaming of a your perfect build that requires you to make your own custom case: Then hopefully I can help you a bit.
In this guide I will attempt to walk through my design process, teach you some basic pitfalls to avoid, and share some resources I have used along the way.
For this first installment I am going to talk a bit about the stages prior to moving into CAD, the sketching phase.
First stages
Whenever I design anything I have a few stages I go through to make sure I can reach a success. These are quite subjective to me, so you may not necessarily agree with them, nor need to follow them. But there is some logic in mine centered around one core tenet:
The earlier you are in a design, the more you should iterate.
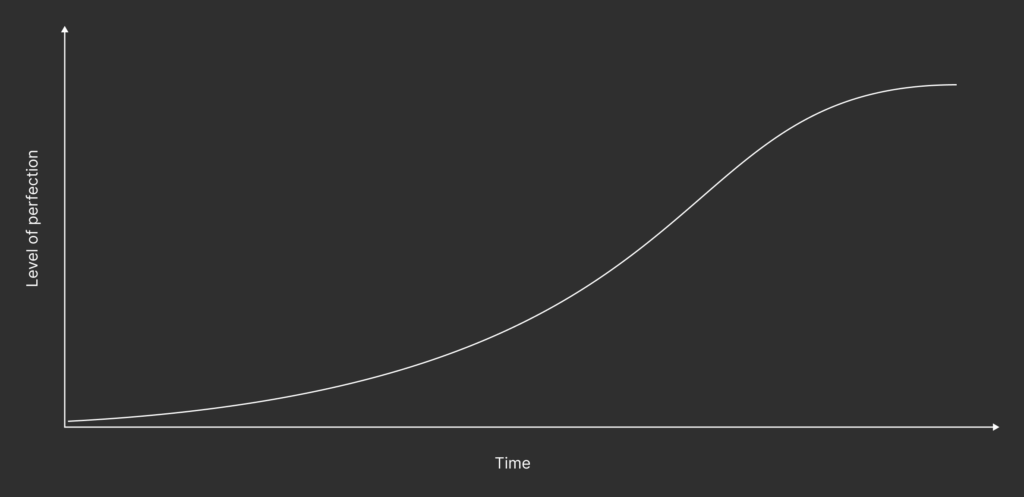
It's much better to fail often, early, and fast than to invest time and energy into a project and ideas that go on forever. As you go along you get attached to ideas and it's harder to kill them. Jumping straight into CAD is just plain stupid. You don't know what you are making! Instead take a step back and spend some time thinking.
I separate these stages into four parts:
- Research & mood-board
- Napkin sketches
- 2D drawings
- Early CAD models
1. Research & mood-board
I put these together because they quite often co-exist. This is the stage where ideas are loosely formed. As you do research it might affect your mood-board, and as you make your mood-board it will affect your research.
For my first case, Tilia, a lot of my research was focused on ATX standards, figuring out different kinds of manufacturing procedures, and actually learning how to use CAD. But for my current project, E32B, I have been spending more time researching different materials, manufacturers, and what coating to give the materials.
What you need to research depends on your experience. A builder like Maki will probably focus on different things compared to someone that's new to this. But the simple answer is: Research everything that you don't know with 100% certainty.
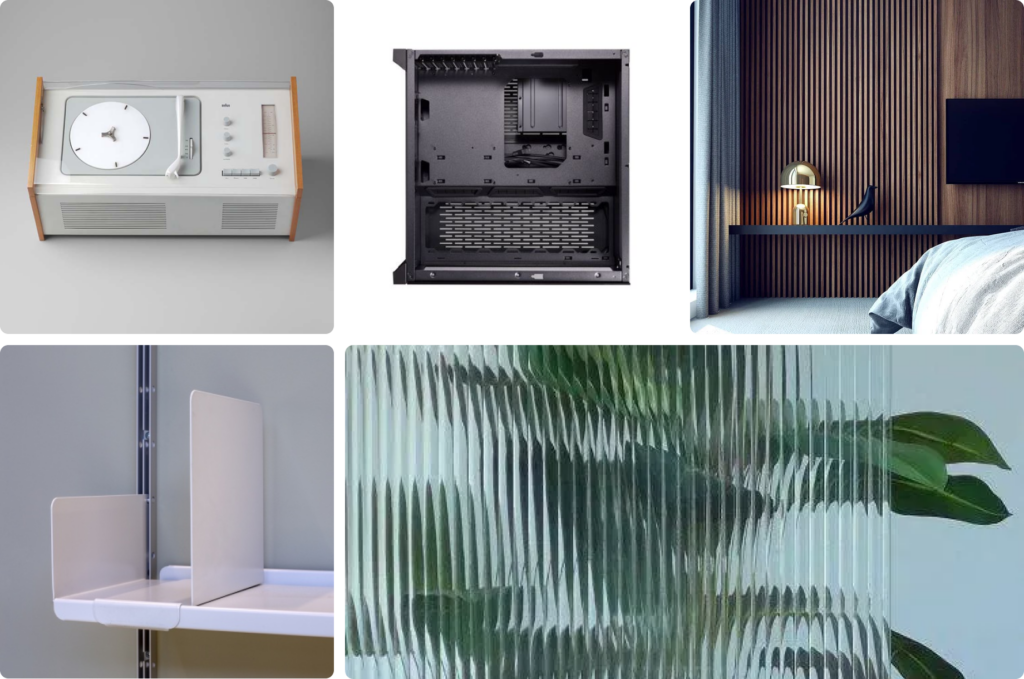
A mood-board is a great tool for you to collect visual ideas for your end result. It can be materials you would like to use, cases with a layout you admire, or even something like a picture of R2D2. It's just there as a reference for you when you are designing, a place to draw inspiration from and help direct your research.
Here are some useful links:
ATX Specifications
Silverstone motherboard form factor guide
Protocase - How to Design Custom Enclosures for Motherboard-Based Systems
Protocase - Tolerances for Dimensional Variance in Sheet Metal and Machined Parts
Protocase - Bend Radii & Minimum Bend Sizes
Various radiator screw hole placements + fan cutouts
2. Napkin sketches
Napkin sketches are fast. Napkin sketches are ugly. Napkin sketches are the best.
This is one of the more fun stages to me. You don't have a care in the world, you just sketch your ideas in whatever way you can think of. For my cases the early sketches are focused on the placement of parts. What goes where? How does that affect dimensions? This will help you answer those questions. You don't need to be good at drawing or make the shapes too complex to convey an idea. If it's not good, you scrap it and draw again.
That's the beauty of it, there's no perfection. There's only progress.
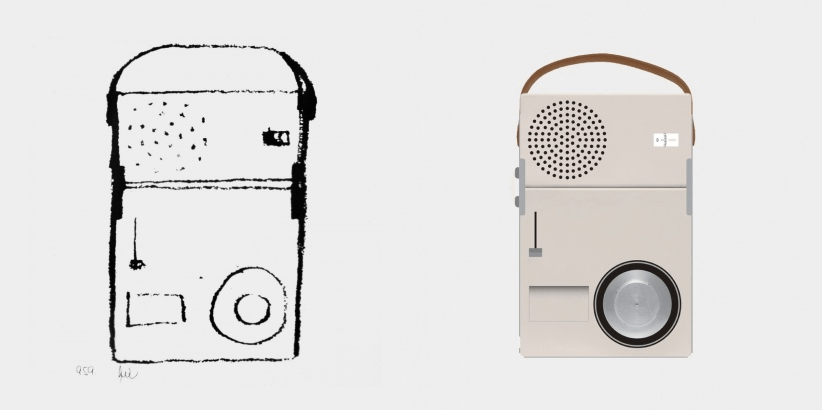
Just look at the above napkin sketch by the famous Dieter Rams. It quite perfectly conveys the idea of the product in just a few simple lines.
Further reading:
How Napkin Sketches During A Pixar Lunch Meeting Led To Four Of The Studio's Greatest Movies
The $1.5m napkin: Paula Scher’s 5 minute logo
3. 2D drawings
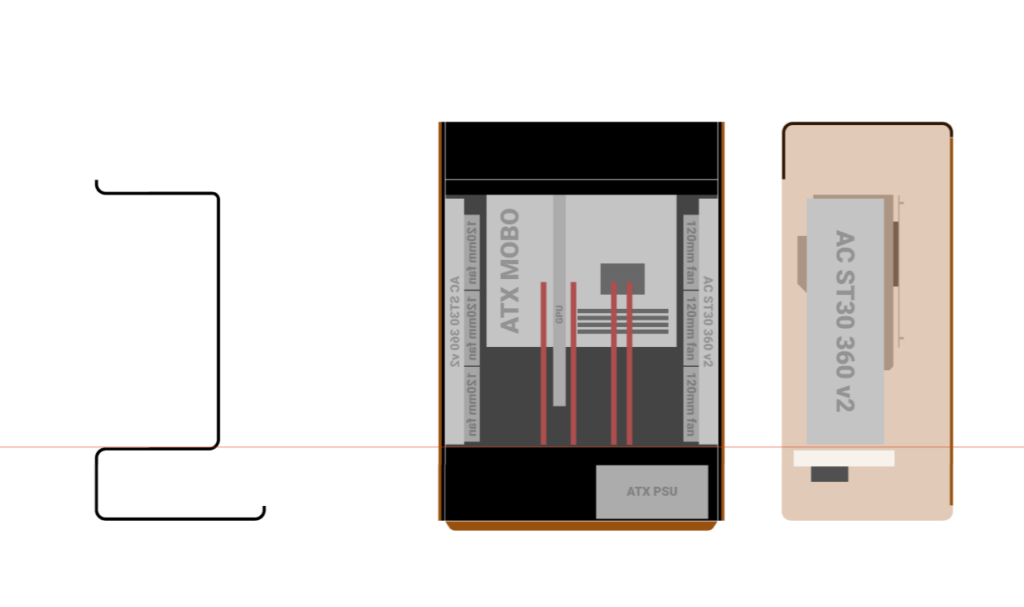
These renditions are mostly included for me to get semi-accurate measurements as well as to clean up my atrocious drawings. Currently my go-to program for this is Figma. It's a quite lightweight tool that you can use in your browser and very suitable for 2D sketching. Personally I have a design library for parts at correct measurements, something I plan on publishing for everyone to use in the future.
What this allows me to do is to pull in a standard measurement motherboard, GPU, and radiators. I can then move them around for fit, and start drawing the shape of my case around that. Since everything is to the scale of 1mm = 1px I know the sizes of things. This is the key point of this step, without it I would be a bumbling mess when I go into Fusion.
The time it would take for me to do one layout in Fusion 360 is equal to the time it would take for me to do ten layouts in Figma. Especially if I am dealing with parts that I don't have an accurate CAD model for.
Further reading:
My Figma component library (soon released)
4. Early CAD models
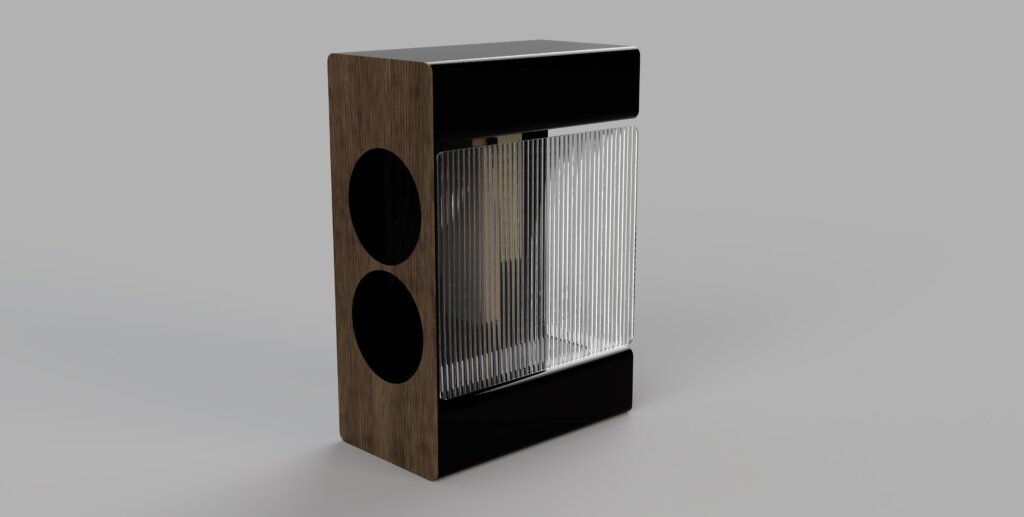
These are my equivalent to napkin sketches, but in 3D. There are certain problems you can solve when drawing in two dimensions, but some things can't be accounted for. That's where the fast and dirty CAD models come in.
At this stage do I care if I fully define everything? Design parametric? Make things neat and tidy? No I don't. Once again, speed is the focus and it will not be perfect nor beautiful. It will however, help identify some problems that may not have popped up or been evident in the earlier stages. How does the glass attach? Can I fit my hand into the bottom compartment to attach fittings?
These are the kinds of problems you will encounter here, and will have to solve. And how do we solve them? We apply the processes we already know.
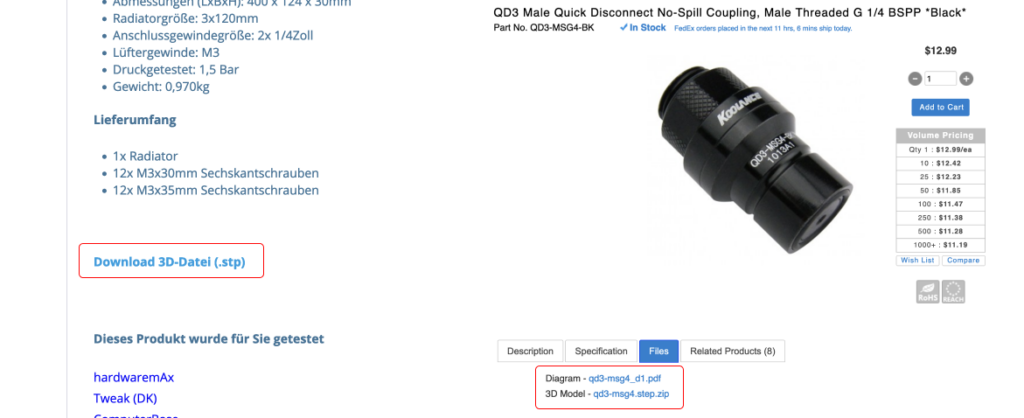
One last tip for this stage: A lot of vendors offer CAD models of their products for free. You will usually find them on their product pages. I have noticed that not all of them are offering them immediately, some may do so after the product has been out for a while, or offer lower resolution models. This doesn't matter too much for us though, we just need them to speed up our sketching.
Useful links:
SFF.Network Resources page
Accurate Blank Motherboard & PCIe Card Models
Alphacool NexXxos ST30 CAD model (they have models of their parts on their product pages)
Lian Li PC-O11 Dynamic CAD model (also from their product page)
In conclusion
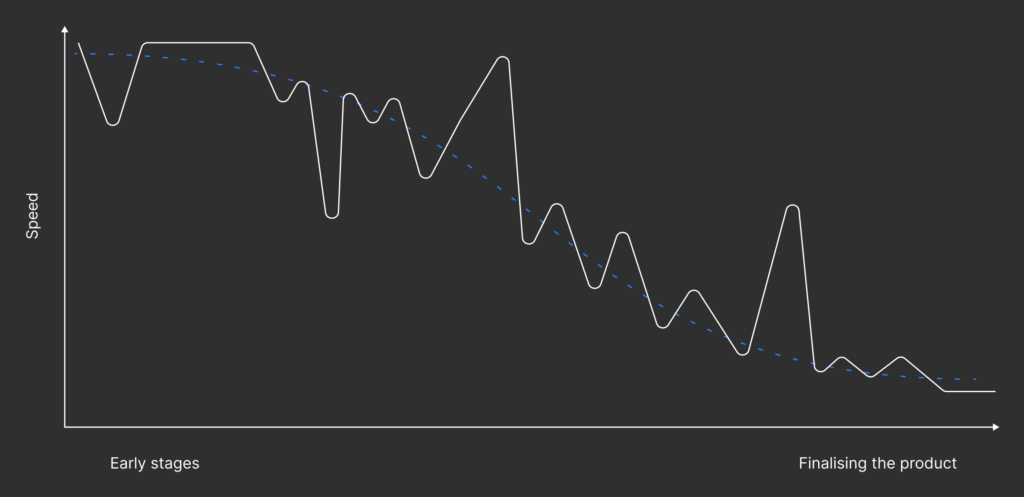
The earlier along in a project you are, the more speed you need. By reducing the complexity of your sketching you can move a lot faster, iterate more, fail, and improve. You can achieve this by going as basic as possible, removing any skill issues, and sketching by hand. From there you can move on and go more and more complex.
As you move along with any project you will have problems, and those can be solved by applying this procedure, albeit in a speedier fashion, again. You will constantly go back and forth between stages in order to solve problems. After all, designing a case is a large problem consisting of smaller problems.
I find it very handy to go back to the napkin sketching even when I am finalizing the project. I can sketch out multiple variations, decide on the best approach, then apply that to the final CAD file. All much faster than if I just tried it in CAD immediately.
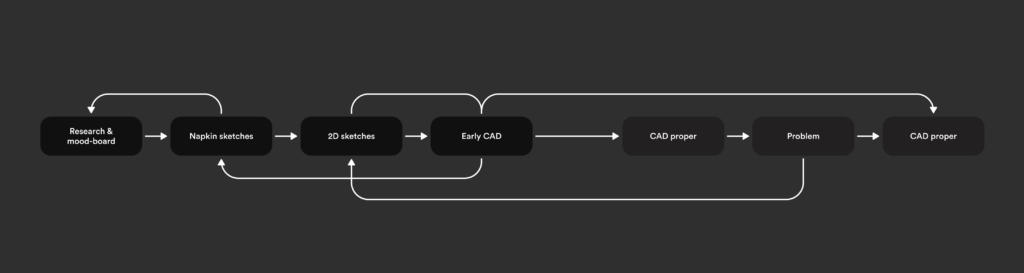
If you look at it on a timeline you will jump back and forth a lot. But that's just you adjusting to the speed at which you need to work. Even at the end you might have to go back and work really fast with quick and dirty sketches to solve some problems.
Next up
In Part 2 of this guide I will talk a bit about CAD modelling as well as how to find and deal with manufacturers.